Thursday, August 17, 2006

Tiny Astronaut figure - Step 8 (Photography)

I got some emails requests on how to photograph such a tiny models.

I could say the technique is all in the lights, but the camera settings has a lot to do with the results also.

I got some ideas from the following sites.
Light box / light tent
Photographing miniatures
Indoor photography
DIY lightbox
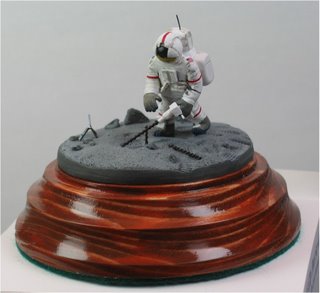
Basically I've chosen a “no flash” setting with the macro option enable on my Canon A95, the macro setting is usually represented by a tulip logo.
Without the direct reflection of lights, with the help of the paper rolls over the neon’s, you have a crisper image quality. But you must use a steady hand or a tripod for such a low light setting.

So basically it is done with the following points only.
- Paper light filtering (just 2 sheets of paper rolled)
- No flash
- Macro setting
- No hands shaking allowed.

Monday, August 07, 2006

Tiny Astronaut figure - Step 7 (A little plus value)

For a fussier look to the base, or a more professional look to it, chose your preference. You can acquire some rolls of adhesive backed felt. It comes in a variety of colors. For this base I've chosen a more conservative green look.


Here's the underside of the base, once the felt is stick to it.


Final look.


I acquire my rolls of felt at Lee Valey

Go to Final pictures or back to Step 6

Sunday, August 06, 2006

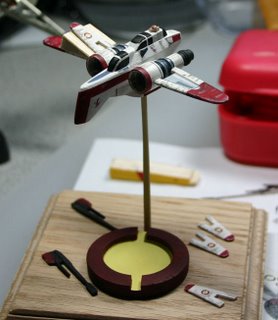
Arc-170 construction process - Step4 (Final)

For the decals step, I've studied each logo, each lines and each graphics to later reproduce them in Paint shop pro, after they were printed on a sheet of decal paper.


The radiators inside the ailerons were printed on 2 surfaces with thinker paper, almost cardboard but acid free. This gave me a thin piece with a lot of details. (little grey wing part on right of the picture).


For the ailerons installation, I had to use a small jig to hold them in place. It was important to have a perfect angle between the 4. For the ones on the underside of the wings I used the same technique but only holding the model upside down, it was done by holding it from its vertical pole, because putting the first 2 little ailerons made the model very fragile.

The dirt was painted by using the dry brush technique. Paint is wiped from the Brush with a towel before applying it to the model.


Final results, with a closer look.


Like said earlier, if you have any specific questions about this construction or for any other matter, don’t hesitate to send a comment from the link below.

Here's a link with other pictures taken during the construction process. ARC-170

Back to Step 3

Saturday, August 05, 2006

Arc-170 construction process - Step3

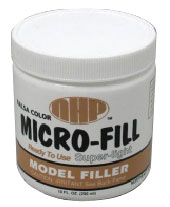
Balsa wood is a very smooth and porous material, curse by some purist (mostly museum quality scale model builder) venerated by other, including myself, It is a very workable product and is very easy to acquire. Unfortunately its grains and pores are always showing after painting, thus divulging the scale of the work. A lot of people had found solutions to hide the grain of the wood, one of them is to apply several layer of CA glue followed with sanding between each layer, I had found this technique to much laborious and smelly. Fortunately for me, I came across this product, Micro-fill for balsa, it is water base and you just have to sand a little after its application, if your patient enough it will hide 100% of the porosity on the wood. For my model discuss here, I applied it only on 55% of the surface, even if this product does miracle for hiding the wood grain I don't particularly love the sanding process, so if you look closely, we can still see some grain on my model.

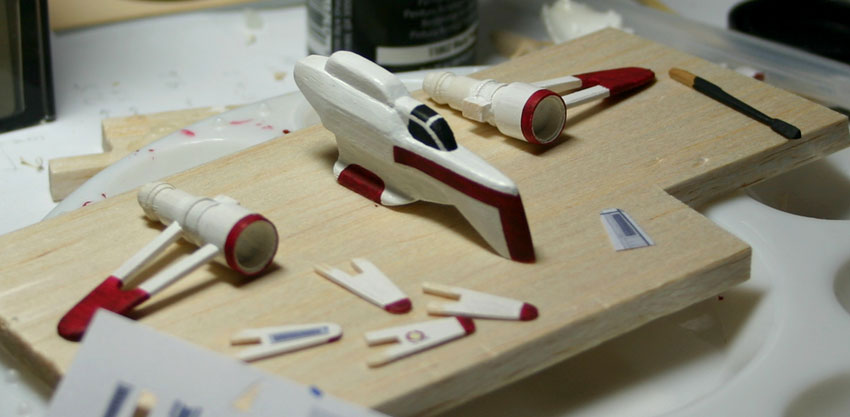
For each glued piece, I had to fill the cracks with the balsa filler, and after sanding everything I applied a full coat of white.

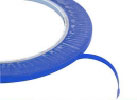
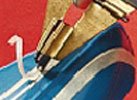
For all the red lines, I've used some 2 mm tape to create really straight patterns (Fig H). When the 2mm tape was too large I used a special x-Acto to create my own narrow tape stripes (Fig I).
Fig H
Fig I


Narrow tape and special X-Acto were bought at Micromark
The Balsa filler at a local hobby store. Udisco

Step 4 to follow (Decals and gluing the ailerons). Back to Step 2

Arc-170 construction process - Step2

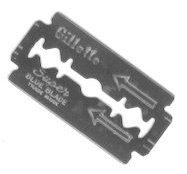
Each little part was cut using this kind of tool, an old Gillette razor blade, unfortunately those blades are becoming harder and harder to find these days.

To use this toll, I just break the blade in half by folding it in the middle (it will break instantly), and I just hold one part between my fingers. This blade cuts Balsa wood like butter, which is giving me real nice cornered shape.

Because of their complexity, the 2 engines parts were the first ones to be built. They were turn on a small Unimat1 lathe, as shown on (Fig C).
This little lathe is excellent for small size parts. Pine wood is my material of choice when turning micro size part; it is cheap and easy to find anywhere. To keep the uniformity of the 2 engines, the parts were turned in one single piece. (Fig D).

Fig C


Fig D


After the engines being done, I simply build the wings, the fuselage and all the different little parts that made the ship. If anyone needs more specifics details for the construction of those parts, feel free to post a question in the comments below.

Step 3 to follow (Filling and painting). Back to Step 1

Thursday, August 03, 2006

Arc-170 construction process - Step1

I had decided to write down the construction process for the little Arc-170 seen in Revenge of the sith. I built that ship back in 2005 for a Starshipmoder.com contest.

At the time, meaning 2 months before the opening of the last star wars movie. Mostly all pictures on the net were controlled badly, so the only reference I had was some 3 views pics of the Hasbro toy. And when you scratchbuild something, the more pictures you have, the easier the construction will be.

Each measures was calculated from the pictures I had, I then tried to draw a small fabrication drawing, as seen on the Fig A pic. That drawing enable me to identify all parts to be cut. Fig A shows mostly all needed parts to build the craft.
See you at Step 2